Charging Case
In 2021 myself and some other assistants were working along side photographer, Clay Cook, on a massive tourism campaign for Kentucky. We worked 38 days over the course of 4 months. We would go for weeks at a time, living out of hotels. After every day of shooting we would have to pull out all electronics to charge and keep them out of harsh temperatures.
Electronics included:
-Two camera cases
-One lighting case,
-One drone case
-6 walkie talkies
-v mount batteries
-1 large anker powerhouse
-6 portable battery banks used for various reasons.
Each case has its own items to charge, forcing us to bring 3-4 power strips and individually unpack and plug in each battery to its charger. Not to mention hunting down outlets in some of these run down hotel/motels.
One night we were all at dinner after a day of production and Clays mentions a charging case. The idea of installing all of the chargers into one large case and tapping into one power source. This would eliminate all of the packing, unpacking, plugging, unplugging and instead we can plug in one cord and the case would light up with power, feeding it to all of the chargers then to the batteries.
So yeah, sounds great. But where are we going to get a charging case that fits our specific needs and has all of the proprietary chargers to our specific brands of gear? The answer is you can’t, at least not without thousands to custom fabricate one with a company. So after talking about it for about 4 months I decided to give it a shot. I had 0 experience. The only thing I’d built was a few wood tables and chairs in high school. But with YouTube and false confidence by my side I figured I’d give it a shot.
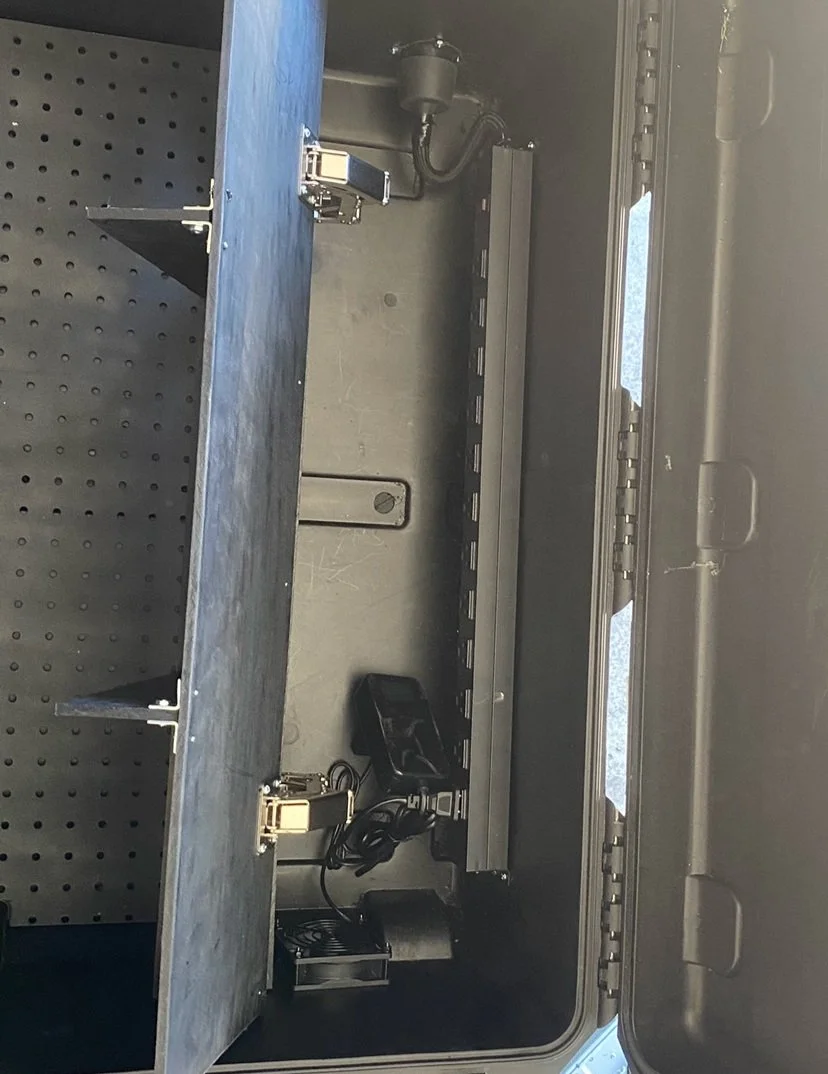
The case provided was a SKB iSeries 3016-10 Waterproof Utility Case that Clay had laying around. First thing I needed to do was draw and figure out where all there batteries and chargers would fit. Cord management was also a problem. With 12-15 chargers that’s a big mess of knotted cables waiting to happen. So I eventually landed on a shelf system where the power and chargers would lay hidden in a component and feed power out to the exposed charging areas.
Next was to research materials suitable and order other components needed including:
20x40 Black PVC sheet (for shelving and walls)
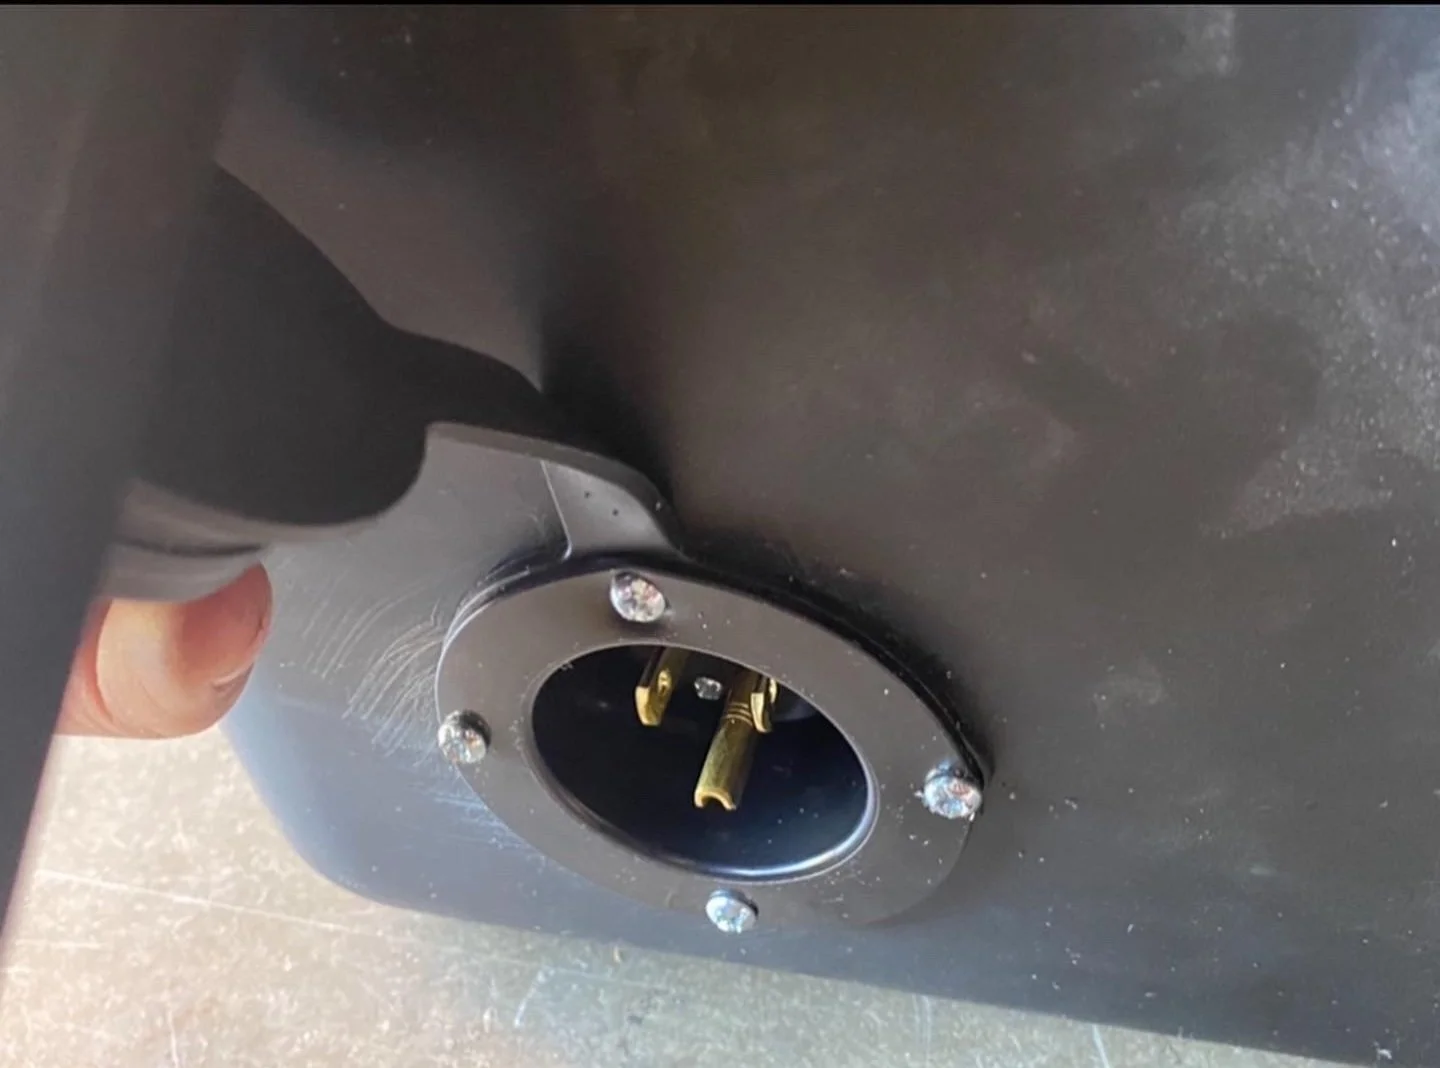
15A Weatherproof Outdoor Power Outlet (to run power externally from the case)
2 Concealed 165 Degree Kitchen Cabinet Door Hinges (to create a lid so the power components can be accessed)
Metal Wall Mount Power Strip with 12 AC Outlets, Aluminum Alloy Mount Power Socket 15A 125V 1875W (all chargers will be ran through this strip)
A bunch of Corner Connector, 90 Degrees: 2 Holes (for securing the walls)
Roll of Adhesive Velcro (to mount batteries)
various sizes of screws
2x4 Sheet of Pegboard
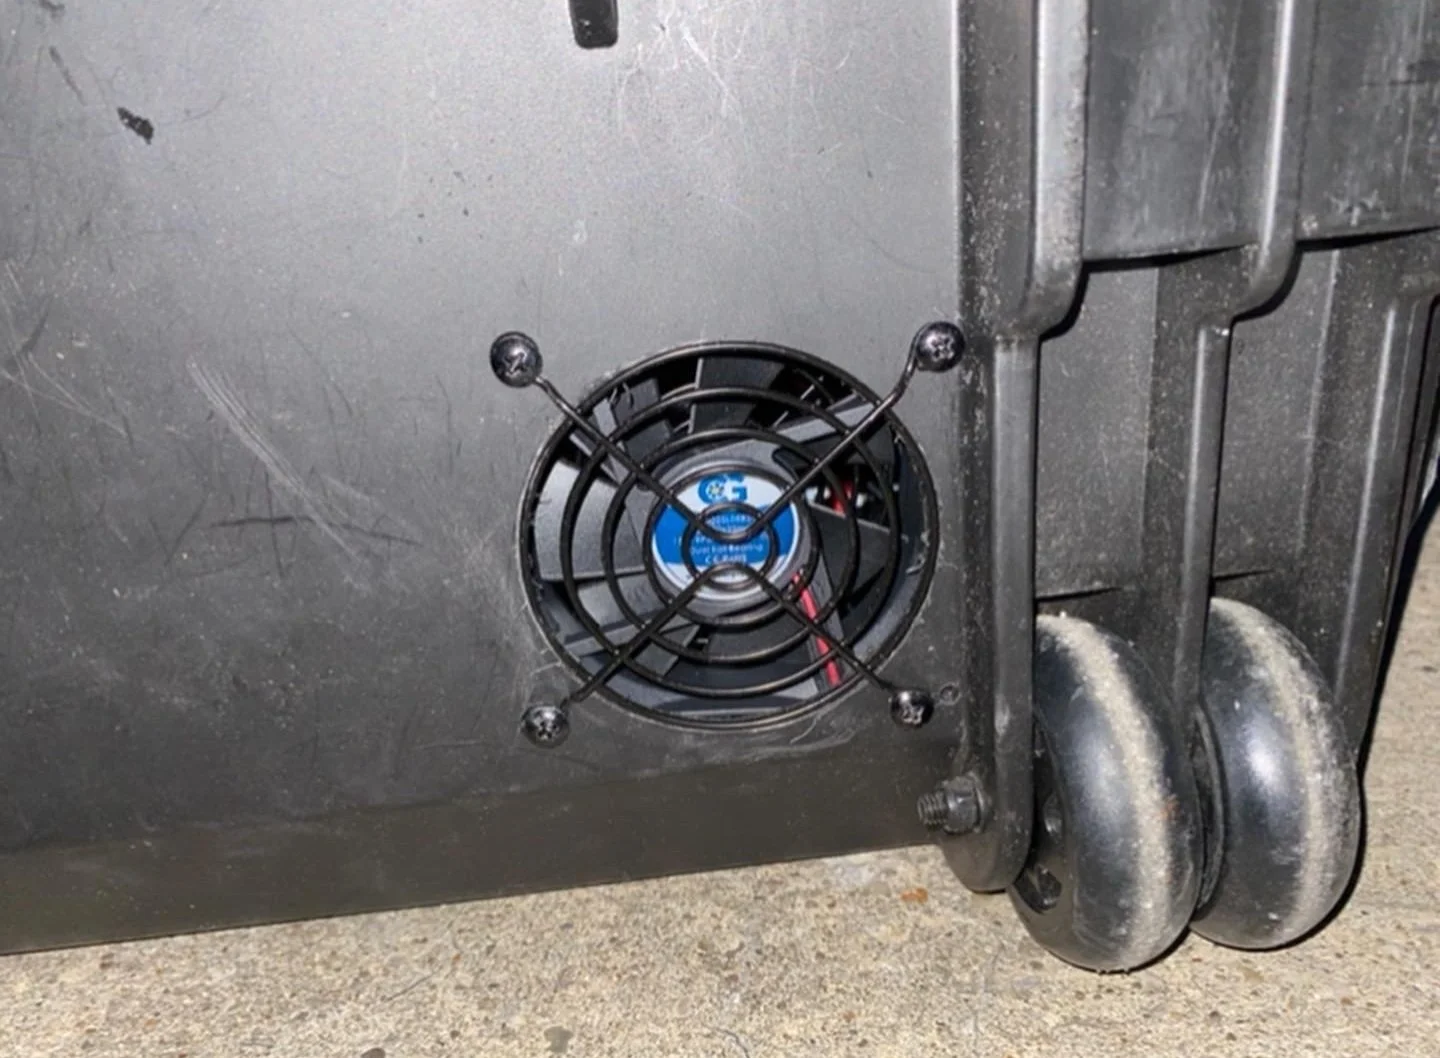
Coolerguys USB Powered Cooling Fan Kits (to draw out heat from case)
USB Charging Station 6-Port (to run fans and any other USB Charging cables)
From then on the fabrication process began. First was measuring and installing the power strip. It was important we got that right because everything else based on would its placement to ensure it all fit and functioned. Then came building the wall, hinge, lid component which was the biggest challenge. I had to measure and cut the PVC sheet into 6 pieces. Two big walls, one shelf, and three small dividers. I built the base compartment by attaching a large wall and the shelf together with the cabinet hinges. After building the base I attached all of the pieces together with 90 degree corner connectors to create sections and walls.
After installing the shelf I had remove the power strip so we could wire it to an external power out so we can power the case with a extension cord. This came about with a quick trip to Lowes and a lot of YouTube videos and very shitty splicing work. But with some gaff tape no one will ever know.
After that came installing the fan. I only installed one fan to draw heat out of the component holding the chargers and power. The charger was powered by USB which I ran to the USB charging port.
Then I drilled holes in the bottom of the wall near the pegboard so we could feed the chargers plugged the strip to the batteries. Installed another outlet in one of the lid component to run power to a 6 outlet port for our Canon Battery chargers (figure something else out Canon). Drilling in our lid pouch and we were practically done with fabrication.
Now all that was left was figuring out battery placement and velcroing all of the batteries and chargers to areas of the case so they wouldn’t just flying around and managing cables.
Threw a bunch of batteries on, plugged into some power and boom, all the indicator lights lid up. Boom, we have power.
If there were a few things I would change or advise you to think about I would say:
Think about accessibility to the chargers, sometimes you just need one charger and not the whole case. My system makes you fight to remove a single charger.
Some of the chargers have charge indicators built into a brick. I have those hidden in the compartment so you can’t check the charge of the battery unless you pull it off and manually check.
Learn your electric. I used a 15 amp power strip on this build but I noticed some batteries were charging a lot slower than usual. I would recommend looking into a 20amp or higher if you are planning on charging this many batteries
If you can learn or know 3D printing it will save you a load of time and measuring.
Overall it was a great learning experience. It has in fact served its purpose on the road and has saved a bunch of time plugging and unplugging.


